Understanding the Process

Refinishing cabinets without stripping can be a real game-changer, especially if you’re looking to give your kitchen a fresh look without the hassle of removing years of built-up layers of paint or varnish. This technique allows you to achieve a stunning transformation with minimal effort and mess.
Types of Finishes
The type of finish on your cabinets will influence how you approach refinishing. Here’s a breakdown of common cabinet finishes:
- Paint: This is the most common finish for cabinets. It can be either oil-based or water-based and can be applied in various colors and sheens.
- Varnish: Varnish is a clear protective coating that enhances the natural beauty of wood. It comes in various gloss levels, from matte to high gloss.
- Lacquer: Lacquer is a hard, durable finish that is often used on high-end cabinets. It dries quickly and produces a smooth, glossy surface.
- Polyurethane: Polyurethane is a tough, durable finish that offers excellent protection against scratches, water, and stains. It’s a popular choice for kitchen cabinets due to its resistance to wear and tear.
- Stain: Stain is a colored solution that penetrates the wood, enhancing its grain and color. It is often used as a base for a clear finish like varnish or polyurethane.
Tools and Materials
Before you embark on your cabinet refinishing adventure, gather the essential tools and materials. This will make your journey smoother and less prone to frustrating surprises.
- Sandpaper: This is your go-to tool for smoothing out imperfections and preparing the surface for the new finish. Use various grits, starting with coarser grits to remove any rough patches and finishing with finer grits to create a smooth surface.
- Paintbrush or Roller: Choose a brush or roller that is appropriate for the type of finish you are applying. A high-quality brush will help you achieve a smooth, even finish.
- Tack Cloth: This handy tool will remove dust and debris from the cabinet surfaces before applying the finish, ensuring a clean and smooth application.
- Drop Cloths: Protect your floors and surrounding areas from spills and drips with drop cloths.
- Gloves: Keep your hands clean and protected from the finish with gloves.
- Respirator: This is essential for protecting yourself from fumes and dust, especially when working with paint or varnish.
- Cleaning Supplies: Keep a supply of cleaning cloths, mild detergent, and water on hand to clean your tools and surfaces as needed.
- Wood Filler: This is useful for filling in any minor dents or scratches in the wood. Use a filler that matches the color of your cabinets for the best results.
Cleaning and Preparation: How To Refinish Wood Cabinets Without Stripping

You’ve decided to give your cabinets a fresh look without the hassle of stripping. Bravo! Now, let’s get down to the nitty-gritty of cleaning and prepping those surfaces. Think of it as giving your cabinets a spa day before their makeover.
Cleaning Wood Cabinets, How to refinish wood cabinets without stripping
Before you even think about applying a new finish, you need to make sure your cabinets are sparkling clean. This step is crucial because any dirt, grease, or old finish residue can prevent the new finish from adhering properly. And nobody wants a finish that’s flaky like a sad croissant.
Here’s a step-by-step guide to cleaning your cabinets:
- Dust and Vacuum: Start by giving your cabinets a good dusting with a soft cloth or brush. Then, vacuum any crevices or hard-to-reach areas. This will remove loose dirt and debris.
- Wash with a Mild Detergent: Mix a mild dish soap with warm water. Use a soft cloth or sponge to gently scrub the cabinet surfaces. Avoid using harsh chemicals or abrasive cleaners, as these can damage the wood.
- Rinse and Dry: After washing, rinse the cabinets thoroughly with clean water. Then, dry them completely with a clean cloth. Make sure there are no lingering water droplets, as they can cause streaks or uneven finish application.
Preparing the Surface
Now that your cabinets are clean, it’s time to get them ready for their new finish. Think of this step as prepping your canvas before you start painting.
Here are some tips for preparing the surface:
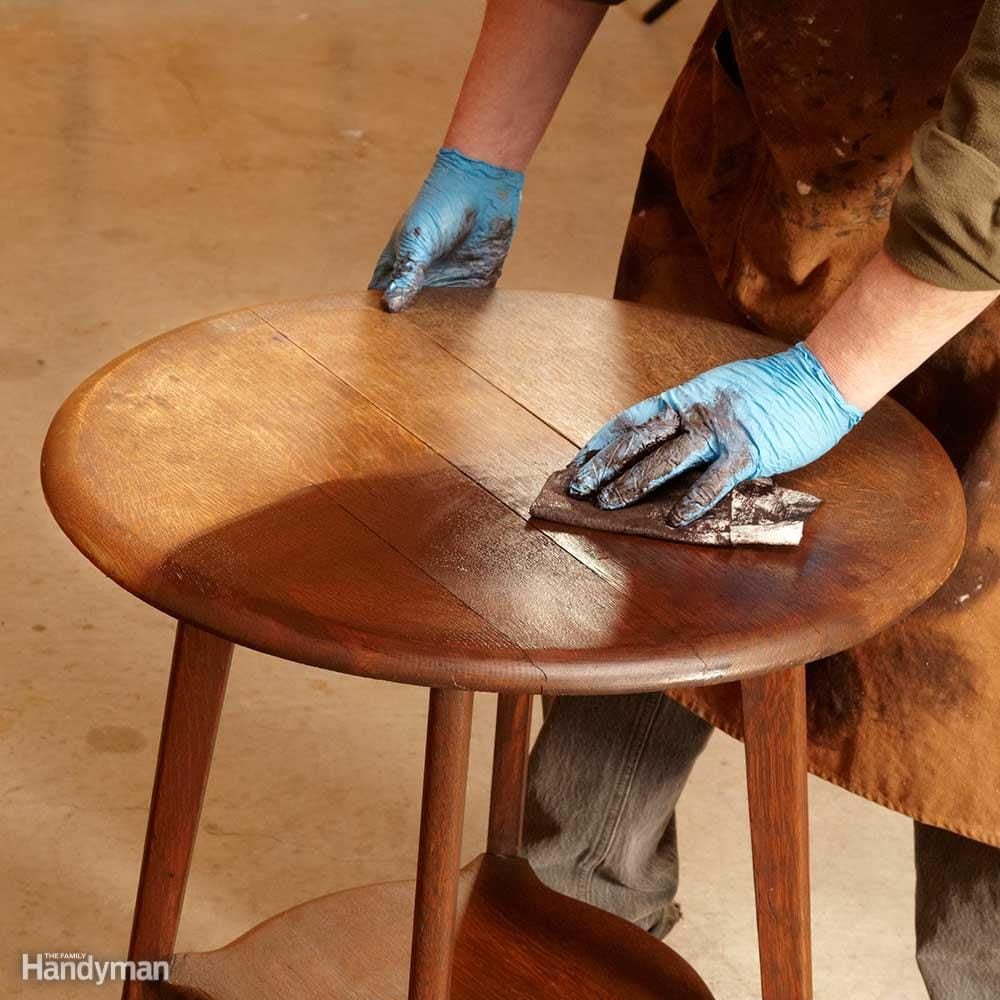
- Sanding: Lightly sand the cabinet surfaces with fine-grit sandpaper (180-220 grit). This will smooth out any minor imperfections and create a better surface for the new finish to adhere to. But be gentle! You don’t want to sand through the existing finish or damage the wood.
- Dealing with Imperfections: For deeper scratches or dents, you might need to use a wood filler. Choose a filler that matches the color of your cabinets and apply it according to the manufacturer’s instructions. Once the filler is dry, sand it smooth to blend it in with the rest of the surface.
- Tack Cloth: After sanding, use a tack cloth to remove any dust particles. This will ensure a smooth, dust-free surface for the new finish.
Remember: Patience is key! Take your time with each step to ensure a flawless finish.
Refinishing Techniques

Now that your cabinets are clean and prepped, it’s time to get creative! This is where you can truly transform the look of your kitchen or bathroom. You’ll have a variety of options to choose from, each with its own unique charm and level of difficulty. Let’s dive into the exciting world of refinishing techniques!
Painting
Painting is a popular choice for refinishing cabinets because it’s relatively simple and affordable. You can choose from a wide range of colors, finishes, and even special effects like distressing or glazing. When applying paint to your cabinets, you’ll want to use a high-quality paint specifically designed for cabinets, ensuring a durable and long-lasting finish. You can apply the paint with a brush, roller, or even a sprayer, depending on your preference and the size of your project.
Staining
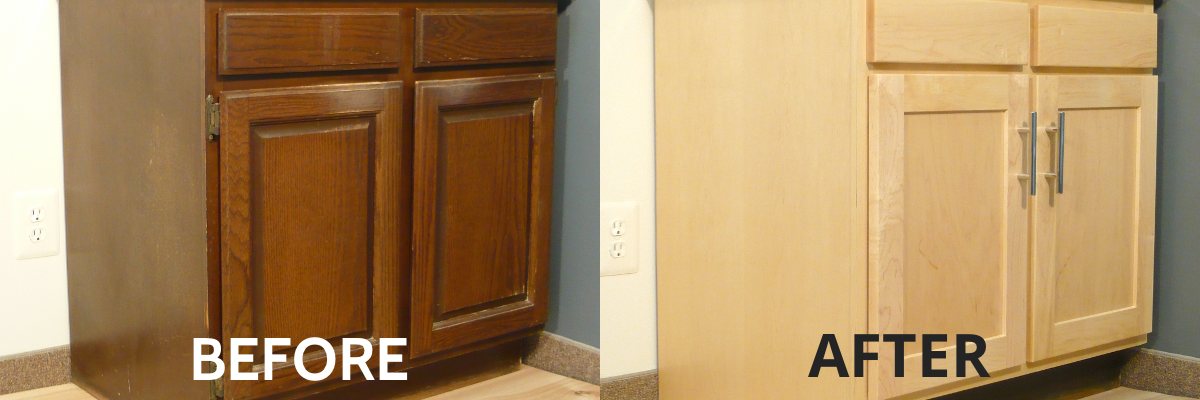
Staining is a great option if you want to enhance the natural beauty of the wood while still giving it a fresh look. Stains come in a variety of colors and finishes, allowing you to achieve a wide range of looks. For example, you could use a light stain to brighten up the wood or a darker stain to give it a more dramatic look. Staining is a bit more delicate than painting, requiring careful application to avoid uneven color.
Glazing
Glazing is a technique that adds depth and dimension to your cabinets. Glaze is a translucent paint that’s applied over a base coat of paint or stain. It can be used to create a subtle antique effect or a more dramatic, distressed look. Glazing requires a bit more practice than painting or staining, but it can be a rewarding way to personalize your cabinets.
Drying and Curing Times
Once you’ve applied your new finish, it’s important to allow it to dry and cure properly. This will ensure that the finish is durable and long-lasting. Drying times will vary depending on the type of finish you’ve used and the environmental conditions. Always refer to the manufacturer’s instructions for specific drying and curing times. It’s important to avoid touching or using your cabinets until the finish has fully cured. This will prevent smudges, scratches, or other damage.
How to refinish wood cabinets without stripping – Sometimes, a simple refresh is all you need to revitalize your space. Repainting cabinets without stripping is a great way to achieve that, just like adding a small ensuite to a bedroom can transform a room into a luxurious haven.
Adding a small ensuite to a bedroom can offer a similar sense of renewal, bringing a touch of spa-like tranquility to your home. Whether it’s a fresh coat of paint on your cabinets or a new bathroom oasis, the result is a space that feels refreshed and inviting.
Refinishing your wood cabinets without stripping can be a delightful way to breathe new life into your kitchen or bathroom. It’s all about a gentle approach, using cleaning solutions and sanding to achieve the desired look. Sometimes, though, the cabinets themselves are the problem – maybe they’re too big or bulky, taking up valuable space.
That’s where thinking about closet doors for small bedrooms can be a game changer! Clever doors can maximize your storage, freeing up space for those beautiful refinished cabinets. It’s a win-win situation, and the perfect blend of style and functionality.
